

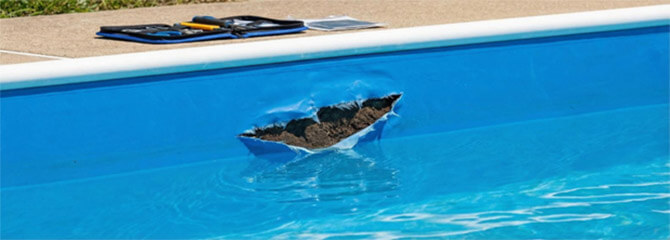
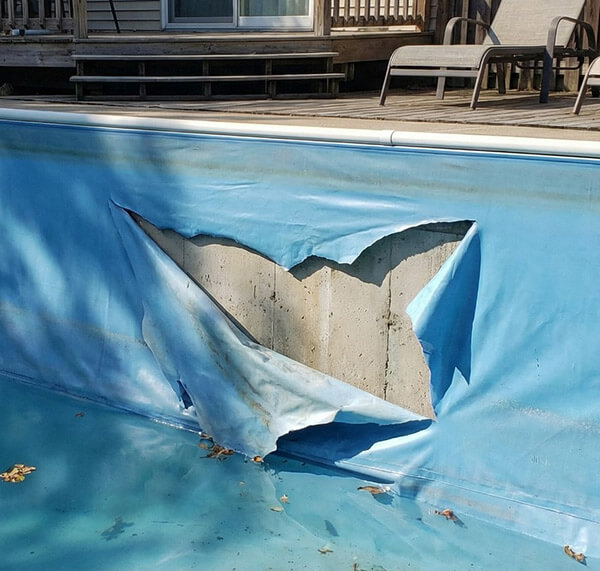
How to Fix a Large Tear in Your Vinyl Pool Liner Fast
Fixing a large tear in your vinyl pool liner can be alarming, but don’t panic. You can often repair substantial rips without replacing the entire liner, as long as the vinyl isn’t too old and brittle.
With the right tools, you can seal the leak and extend your pool’s life for years.
This guide will walk you through repairing a large tear, whether it’s above or below the waterline, so you can get back to swimming.
Shop recommended pool repair products on our Amazon storefront to find the tools and materials you need to fix your vinyl pool liner quickly and effectively.
What You Need for a Vinyl Liner Tear Repair
Before you jump into the water, you need to gather the correct supplies. Having everything within arm’s reach is crucial, especially if you are performing an underwater repair where you can’t easily pop back out for a forgotten tool.
Gather the following materials:
- Heavy-duty vinyl liner patch kit: Look for kits specifically designed for large tears or underwater use.
- Vinyl adhesive rated for underwater repairs: This is non-negotiable. Standard glues will wash away or fail to bond in wet conditions.
- Clean cloth or soft scrub pad: For prepping the
- Scissors or a sharp utility knife: To cut the patch to
- Plastic Syringe that can hold and squirt glue for areas where the patch did not adhere to the liner.
- (Underwater) Gloves: Keep things clean and protect your hands from sticky glue!
The success of your repair hinges on the adhesive, quality and size of the patch. Ensure the glue you choose is formulated to bond underwater and remain flexible. A rigid glue or patch will eventually crack as the liner shifts and stretches with temperature changes and water weight.
Step 1: Inspect and Assess the Damage
Not all tears are created equal. Before you start cutting patches, take a moment to evaluate the severity and location of the damage.
- Check the size of the tear: While small punctures are easy fixes, tears larger than 6–8 inches may require a specialized, oversized patch or even professional attention if the tension on the liner is too high.
- Look at the location: Is it on a flat section of the wall, on the floor, in a corner, or near a fitting like a skimmer or return jet? Flat surfaces are easiest to Corners and fittings may require more patience and careful trimming to ensure a watertight seal.
- Assess the liner condition: Touch the vinyl around the Is it still pliable and flexible, or does it feel dry, brittle, and stiff? Patches adhere best to flexible vinyl. If the liner is crumbling apart, a patch might just cause further tearing nearby.
Step 2: Clean the Area Around the Tear
For the patch to stick properly, the surface of your liner needs to be clean. Algae, sunscreen, and dirt can prevent the adhesive from bonding with the liner, causing it to peel off later.
- For underwater repairs: Use a clean cloth, a soft scrub pad, or even your hand to wipe the area around the tear. This will remove the slippery “bio-film” often found on submerged surfaces.
- For above-water repairs: Clean the area with a cloth and then dry it A bone-dry surface ensures the strongest possible bond.
Effortless cleaning starts here—explore Cordless Vacuum Robots now! [Shop now]

Step 3: Cut a Properly Sized Patch
Size and shape matter when cutting your patch. The golden rule is that the patch should extend 2–4 inches (the longer, the stronger) beyond the tear in every direction. This overlap creates a strong bond and distributes the stress evenly across the damaged area, preventing the tear from spreading underneath the patch.
For tears over 4 inches long, a single large patch is usually sufficient, especially if the tear is on the pool floor where the ground provides support.
Check out our YouTube video showcasing an extra-large liner repair on the floor of a commercial pool!
However, for large tears on the walls or in the bottom corners, you may need to apply multiple overlapping or crossing patches. This adds extra strength, as the patch must hold back the water pressure without any direct support from behind.
Check out our YouTube video showing you how to repair extra-large tears. Follow these tips for cutting:
- Round the edges: Sharp corners are the enemy of a good They tend to snag and lift over time. Always cut your patch into a circle or oval shape.
- Avoid complex shapes: Keep it simple.
- Use a single piece: For long tears, cut one long, continuous oval or rectangular (without corners) patch rather than trying to puzzle together multiple smaller pieces.
Step 4: Apply Vinyl Adhesive
Once your patch is cut, it’s time to apply the glue. The technique differs slightly depending on where the tear is located:
● For underwater repairs:
- Coat the entire back of the patch generously with
- Fold the patch in half like a taco, with the sticky sides facing each other. This prevents glue from washing away as you swim to the
- Once at the damage site, unfold the patch directly onto the tear.
- Apply extra glue to the edges using a syringe if
needed, targeting areas where the adhesive didn’t stick properly.
- Press the patch firmly onto the liner to improve durability and prevent edges from lifting over time.
● For above-water repairs:
- Coat the back of the patch evenly with
- Carefully position it over the tear without letting it touch other surfaces
- Press the patch firmly into
● General tips:
- Ensure full adhesive coverage all the way to the edges of the
- Dry edges are the most common failure points, so take extra care to seal
Step 5: Install and Smooth the Patch
Placement is key. Press the patch firmly over the tear. Start applying pressure from the center of the patch and work your way outward toward the edges. This motion pushes out trapped air bubbles and ensures consistent contact between the patch and the liner.
For vertical wall patches, use your palm or a roller to apply steady pressure for 30–60 seconds. This initial hold allows the adhesive to grab onto the liner wall effectively.
Discover High-Quality Outdoor Furniture Built to Last

Step 6: Let the Patch Cure and Reinforce
Once the patch is applied, it’s time to let it cure and add reinforcement if needed.
- Smooth the edges: Run your thumb or a roller around the edges one last time to ensure they are flush against the liner.
- Allow it to cure: Resist the urge to poke at the Avoid disturbing the area for at least 24 hours to allow the chemical bond to fully cure.
- Consider reinforcement (optional): For large tears or older liners, you can use a “double patch” technique.
- After the first patch has cured for 24 hours, cut a second, slightly larger
- Apply this new patch over the initial
- This adds an extra layer of stability and gives you peace of
Step 7: Check for Leaks
After the curing period is over, it’s time to verify your work.
- Inspect the patch: Run your hand gently around the edges of the It should feel sealed and smooth, with no lifting or peeling.
- Double-check the seal: You can use a dye test around the edges of the patch to be
- Monitor the water level: The ultimate test is observing your pool’s water level for the next 24–48 hours. If the level stabilizes and stops dropping (beyond normal evaporation), congratulations—your repair was a success.
Need More Help?
If you’re still unsure about whether your pool is leaking or how to address the issue, don’t worry—we’ve got you covered! Check out our full guide How Do I Know If My Pool Is Leaking? A DIY Guide for detailed tips, tools, and step-by-step instructions to detect and fix leaks like a pro. Take control of your pool maintenance today!
When to Stop Patching and Start Replacing
While a patch is a fantastic, cost-effective solution, it isn’t a miracle cure for a dying liner. There are times when replacement is the wiser investment.
Consider replacing the liner if:
- The liner is old: Most vinyl liners last 10–12 years. If yours is past this age, patches may be a temporary fix for a failing structure.
- The vinyl is brittle: If the liner feels like hard plastic or cracks when you push on it, it has lost its elasticity. New tears will likely appear soon.
- Multiple leaks: If your pool resembles a patchwork quilt, it’s likely time for a fresh start.
Extending the Life of Your Pool
Repairing a large tear in a vinyl liner is a manageable DIY project that can save you thousands of dollars in premature replacement costs. By using heavy-duty materials, applying the right adhesive techniques, and ensuring a smooth application, you can stop leaks in their tracks.
If you’re tackling other maintenance issues or want tips on identifying those hard-to-detect leaks, don’t miss our article: Where Do Most Pool Leaks Occur? (Top 7 Places to Check First)
Looking for the right tools? Shop our recommended pool repair products on Amazon to fix your vinyl liner quickly and effectively.